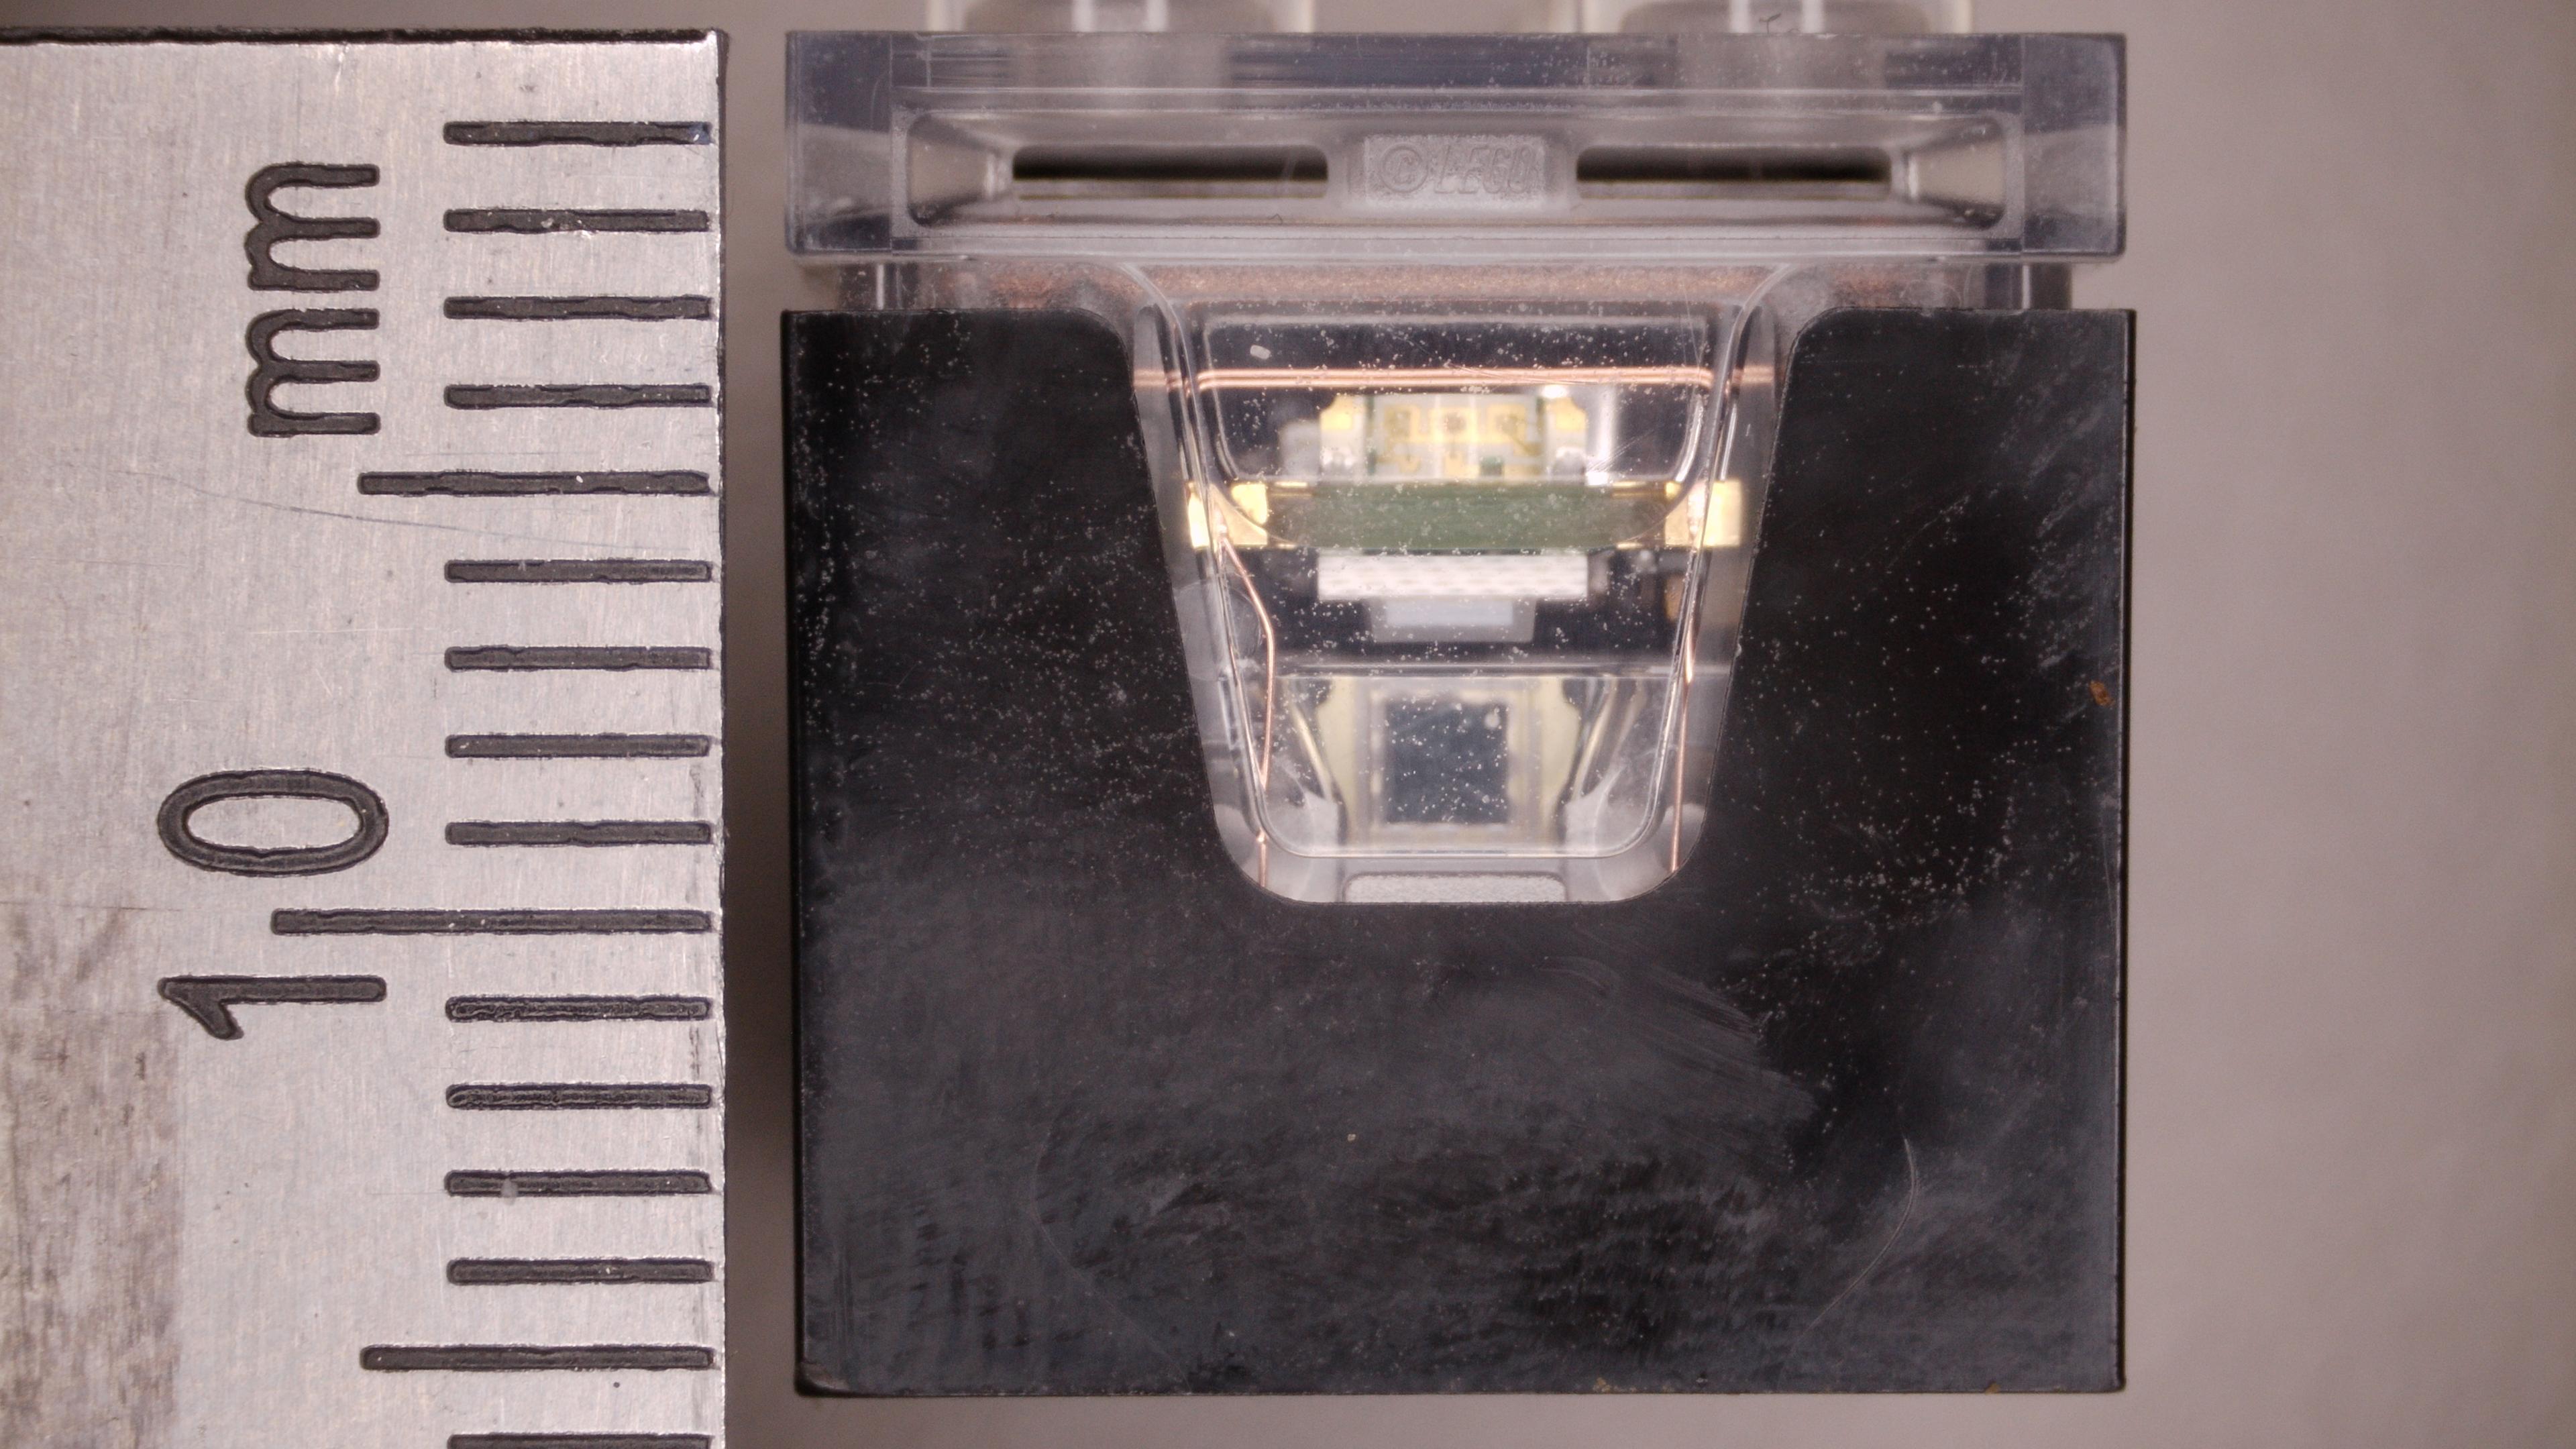
first impressions of the Lego smart brick, before I do any actual tearing down: wow, I forgot how good they are at working with plastic.
-
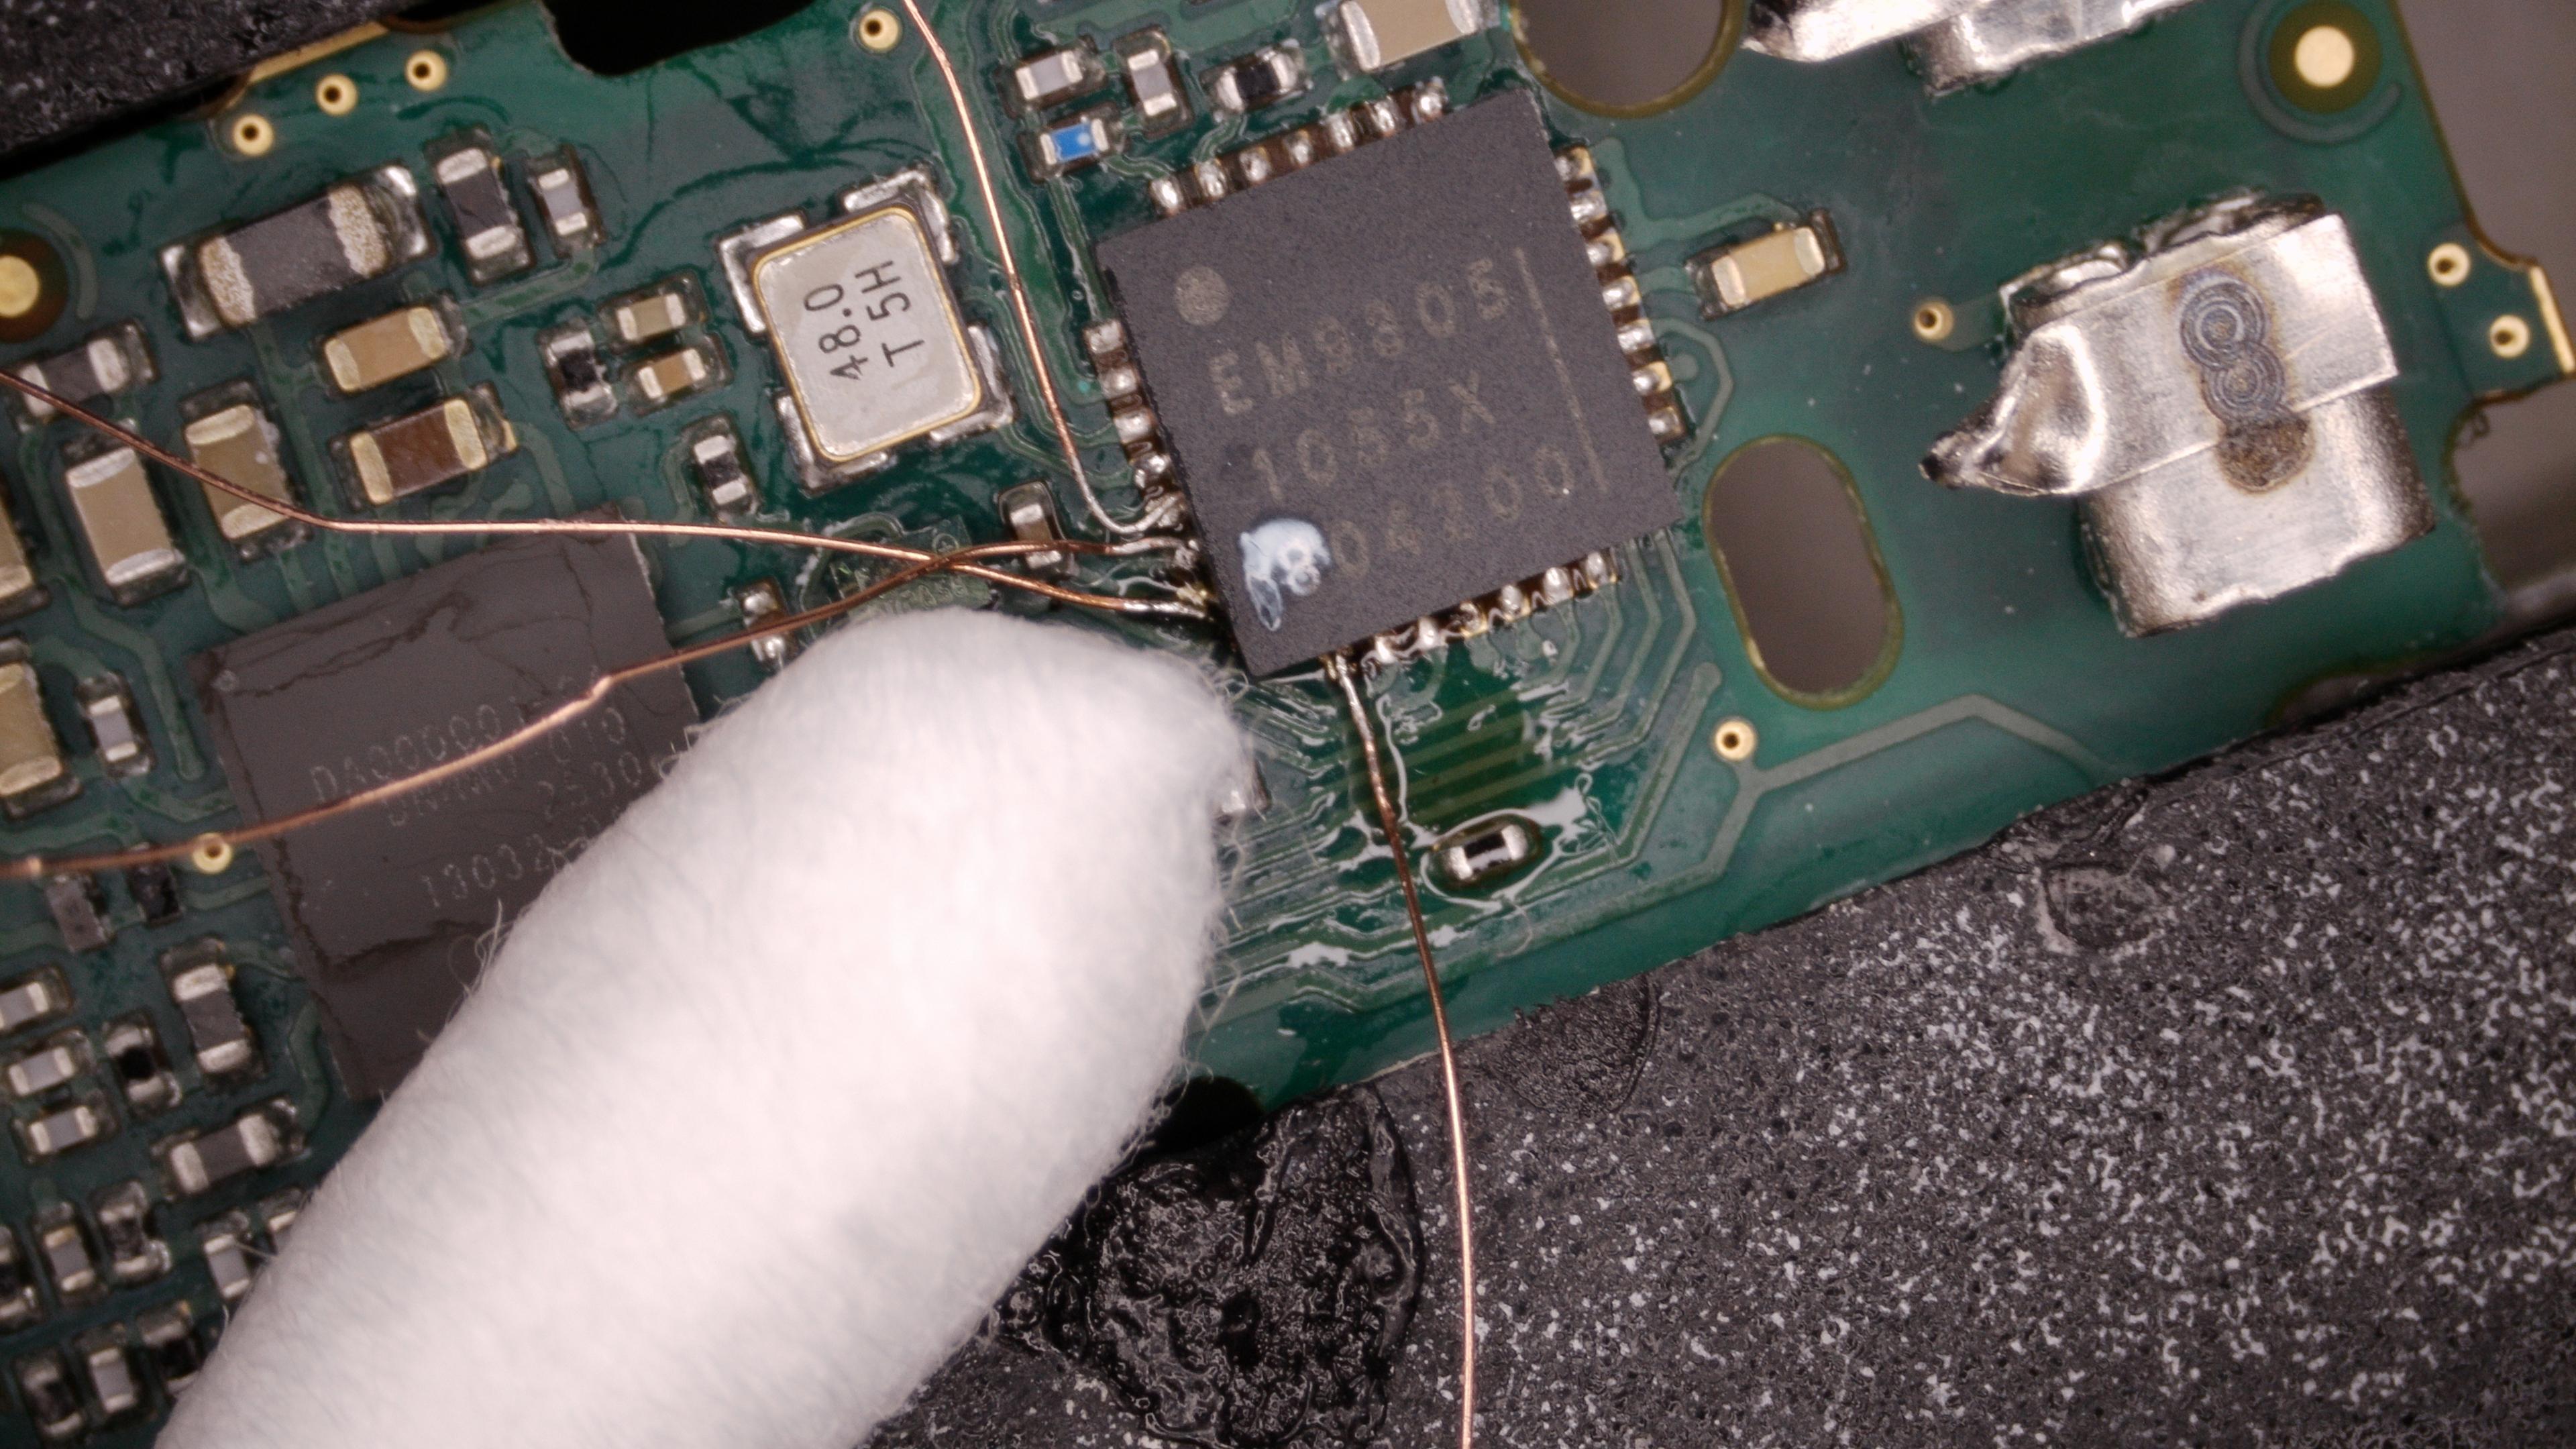
alright let's dump the ARC chip now
not my best work but it should do the trick
feat. comically big q-tip
-
not my best work but it should do the trick
feat. comically big q-tip
@whitequark oh lol I thought it was a cat’s paw
-
@whitequark oh lol I thought it was a cat’s paw
@dev that would be a really small cat
-
not my best work but it should do the trick
feat. comically big q-tip
unfortunately, i could not access JTAG. i think i ran out of time i have for playing with this board, good luck @ everyone else
shout out to:
https://github.com/nanash1/smart_brick
https://codeberg.org/shelfofsheelfs/SMART-Brick
for doing good work! -
unfortunately, i could not access JTAG. i think i ran out of time i have for playing with this board, good luck @ everyone else
shout out to:
https://github.com/nanash1/smart_brick
https://codeberg.org/shelfofsheelfs/SMART-Brick
for doing good work!after reading the datasheet a bit more carefully, i know why i couldn't: the JTAG port is simply not exposed unless the firmware configures the pin mux that way. i'd have to dump the firmware in some other way
-
after reading the datasheet a bit more carefully, i know why i couldn't: the JTAG port is simply not exposed unless the firmware configures the pin mux that way. i'd have to dump the firmware in some other way
@whitequark oh how fun, but makes sense for such a pin-constrained device. Is there any other way to access it or is the chip just impossible to reprogram it if it doesnt expose JTAG?
-
@whitequark oh how fun, but makes sense for such a pin-constrained device. Is there any other way to access it or is the chip just impossible to reprogram it if it doesnt expose JTAG?
@cinebox it has a bootloader which I assume is how it's programmed by LEGO; I think I know how to trigger that but I just wanted to connect JTAG because it was more challenging to solder these tiny wires and I'm bad at doing it
-
after reading the datasheet a bit more carefully, i know why i couldn't: the JTAG port is simply not exposed unless the firmware configures the pin mux that way. i'd have to dump the firmware in some other way
@whitequark could it have booted in cJTAG mode?
-
@whitequark could it have booted in cJTAG mode?
@ldcd the datasheet explicitly says the JTAG pins are GPIO'd
-
here's a video that shows in more detail the moldwork in the transparent plastic part
@whitequark are the pips on top buttons too?
-
@whitequark are the pips on top buttons too?
@lenary no, just normal lego brick shape
-
not my best work but it should do the trick
feat. comically big q-tip
@whitequark I know this seems like an ordinary jump to you but if I managed to get one as clean as this, I'd feel like a goddamn hero

I ruined a beautiful rf01(one of those xbox 360 donor rf recievers wired through usb) with my soldering
Then it died but I think that was because I wasn't supplying the right power the right way(iirc it wanted a stable 3.3v and I just gave it a nodemcu 3v3) which was a common problem on these boards
-
@whitequark I know this seems like an ordinary jump to you but if I managed to get one as clean as this, I'd feel like a goddamn hero
I ruined a beautiful rf01(one of those xbox 360 donor rf recievers wired through usb) with my soldering
Then it died but I think that was because I wasn't supplying the right power the right way(iirc it wanted a stable 3.3v and I just gave it a nodemcu 3v3) which was a common problem on these boards
@sounddrill if you're in the area I can teach you how to do it as cleanly as this. nothing special about it
-
finally done. no shorts and (as far as i can tell under mag) no opens
@whitequark This is wonderful
")
-
@whitequark but the most important question remains unanswered: Can you make it play actual star wars sounds instead of the unintelligible gibberish now?

@triplef that would have to involve the totally undocumented ASIC
-
@triplef that would have to involve the totally undocumented ASIC
@triplef honestly the easiest way would be to join LEGO and get all the docs. I probably could do this if I wanted
-
@sounddrill if you're in the area I can teach you how to do it as cleanly as this. nothing special about it
@whitequark I'm way out in South India but hey, thanks!
I first learned basics of PCB design years ago over a discord server so I'll be sure to ask if I need to pick something up
-
@ldcd the datasheet explicitly says the JTAG pins are GPIO'd
@whitequark yup i only mention because TMSC (GPIO11) and TCKC (GPIO10) both go straight to vias (and then maybe to the array of testpoints on the back?); Wheras TDO (GPIO9) seems to go to the flash and TDI (GPIO8) seems to go ??.
So I was thinking there's a chance they might be explicitly configuring it as cJTAG and using it for a boundary scan test after manufacture.
-
@whitequark yup i only mention because TMSC (GPIO11) and TCKC (GPIO10) both go straight to vias (and then maybe to the array of testpoints on the back?); Wheras TDO (GPIO9) seems to go to the flash and TDI (GPIO8) seems to go ??.
So I was thinking there's a chance they might be explicitly configuring it as cJTAG and using it for a boundary scan test after manufacture.
@whitequark if the REd schematic is to believed TCKC goes only to a testpoint
-
@whitequark if the REd schematic is to believed TCKC goes only to a testpoint
@ldcd hm it's possible but i haven't implemented cJTAG yet so can't easily test